Wednesday, February 24, 2010

Guanciale - Trio of Classic Italian Dishes

Guanciale (gwan-chee-awl-ay) has been called the Roman magical bacon. It is Italian bacon that is dry-cured from pig jowls. Salted and spiced and left hung to dry for weeks to months, the unsmoked pig jowl has a unique flavor that sets itself apart from other cured and smoked meats.

It is very different from pancetta or bacon where it has a more intense pork flavor. The cheeks have a unique taste and it lends that flavor to the dry curing process. The guanciale is washed in wine before salting and spicing. After a month, it is ready to eat.


The guanciale has buttery dense layers of fat. It melts go easily on a even-tempered pan and cooks quickly. It is best to cut thin strips and fry on a low temp to not overburn. Right away you can smell the intense porkiness. And as you can suspect, the rendered fat also packs huge flavor upon anything fried in it.

Guanciale can be used like you would use pancetta or bacon, however, pancetta and bacon are not worthy substitutes when a recipe calls for guanciale. I emphasize, there is no substitute for guanciale!

There are three classic Italian dishes that are linked to guanciale. Matched with long, tubular pasta and aged cheese, these dishes are simple in ingredients but loom large on the plate and palate.

Bucatini al’Amatriciana

I've seen recipes that have pancetta or bacon but the classic enforces the use of guanciale. Bucatini pasta also makes it more classical. Bucatini, a long, thick pasta with a hole running through the center, comes from Lazio. It is also called perciatelli. 


For all recipes, the amount of ingredients vary for how many servings you are preparing. I cooked for one so amounts are small.

Ingredients:
  • thin slices of guanciale
  • 1 onion
  • 2 garlic cloves
  • Pecorino-Romano cheese
  • homemade or store bought tomato sauce
  • bucatini
Cook guanciale on pan for a few minutes each side. Heat on a low-medium temperature and try not to overburn. When done, set aside and reserve the rendered fat.

Thinly slice onions and slow cook them in the rendered fat for 15-20 minutes. The slow-sweating process really brings out the sweetness of the onions. Stir once in awhile.

Start boiling salted water and add your bucatini. Cook for 8-9 minutes.Once the onions are almost done, thinly slice the garlic and add to the onions.

When guanicale has cooled, cut into a smaller dice and add the guanciale to the pan cook for a few minutes. Add a few spoonfuls of the pasta sauce and stir combining all the flavors and cook for a minute or two.

Drain the pasta and add it to the pan and swirl together. Cook for a minute then grate some Pecorino-Romano cheese and add cut fresh Italian parsley.


Bucatini alla Gricia

This is another Roman classic. Created with simple ingredients, only four, it is a delightful and flavorful meal. This is where aged cheese meets aged pork, pig meets sheep.

Pecorino is derived from the Italian word "pecora" which means sheep. It is made from sheep's milk and aged for months to years.

Ingredients:
  • guanciale
  • bucatini
  • Pecorino-Romano cheese
  • cracked black pepper
Cook pasta in boiling salted water for 8-9 minutes. Drain and reserve a tablespoon of pasta water.

Slice the guanciale in strips and cook on each side for a few minutes.Slowly cook the guanciale to soften the fat, keeping it translucent, to not overburn it. Add a few drips from the pasta water to keep the guanciale moist. The starchy water combines with the rendered fat to somewhat create a sauce for the dish.

Toss the pasta into the pan and cook until it sizzles. Add a few turns of cracked black pepper and grated some Pecorino-Romano cheese. Avoid adding too much cheese. The cheese helps bind the pasta and guanciale together.


Bucatini alla Carbonara

This dish is very similar to Bucatini alla Gricia with the addition of adding an egg at the end of the cooking process. The beated egg adds a creaminess to the dish.

Ingredients:
  • guanciale
  • bucatini
  • 1 egg, beated
  • freshly grated Pecorino-Romano cheese
  • Italian parsley, chopped
  • salt and ground black pepper
Slice the guanciale into strips and slowly cook in the pan. Set aside and when cool, cut into dice. Save the rendered fat.

Cook bucatini in boiling salted water for about 8-9 minutes.

Beat egg and set aside. Add a few grated slices of cheese to egg mixture.

Drain pasta and add it to the pan with rendered fat, cook until al dente. Remove from heat and add the egg/cheese mixture. Season with salt/pepper. The heat of the pasta will cook the egg when you toss the ingredients together.

Chop some parsley and grate some more cheese and add to dish along with the guanciale.


All three dishes were fantastic. I am not Italian but while preparing and partaking in these classics, I felt a little closer to the Italian people and understood more about the care into making good food and the culture of the food.

With all respect to bacon or pancetta, Guanciale is better, tastier, at least to my palate. Maybe it is more refined in my mind. Sure, you could fry up a slice of guanciale and add it to a lettuce and tomato sandwich or serve it alongside pancakes. Those would taste just great. But guanciale to me, is an Italian thing. It celebrates the pig in a different way, it takes me to land and culture generations old.

To me, a pig's heart is in his jowls.

Try some guanciale. I purchased my 100% genuine Berkshire pork guanciale from Bolzano's Artisans Meats in Milwaukee, WI. It used to be hard to find in America but with more meat markets doing the dry-curing process, it should be available in your local area.

Monday, February 22, 2010

Candied Bacon

I am not always in the mood for a mixture of salty and sweet together but I really wanted to try a candied bacon. Sweet to the tooth yet crunchy with that pork bite.

Brown sugar and pure maple syrup is used to sweeten up the bacon. Brush both sides of the bacon with syrup and sprinkle both sides with brown sugar as well.


Bake for 18-20 minutes or until crispy at an oven temperature of 420 degrees. Do not overcook the sugars as they will burn and turn black and basically create the bacon unedible. Cook it just right and you will receive a finger-sucking sweet sheet of bacon.


The brown sugar and maple syrup cooks right into the bacon and coats it like a nice glaze. Behind the sweet notes is the crunchy pork flavor. A winning combination for bacon lovers. Though I did not make pancakes, the candied bacon would make an excellent topping. Once again, bacon proves to be the ulimate powerhouse in taste and can be matched with most anything, edible of course.

Thursday, February 18, 2010

Cuban Burger

I had a lot of leftover ham from my last Pork Drunk post. Hot ham & cheese sandwiches are great but the thrill can only last so long. I decided to take it up a few notches, making a slight adjustment to the classic Cuban sandwich.

I usually only eat burgers during the baseball days of summer but with Spring Training right around the corner, I thought a good burger was in order. As ptitchers and catchers report, a rare, juicy burger combined with ham, is the way I will prepare for the big season.

To start,  I made garlic mayonnaise. Roast some garlic, puree or fine chop and add to a quality mayonnaise.

Next up, the burger. I seared the ground chuck meat on a cast-iron skillet. I like my burgers rare, medium-rare so I cooked about 2 minutes on both sides. Season with salt and pepper.

To prepare your burger, layer the ingredients in this order:
  • Roasted garlic mayonnaise
  • Dijon Mustard
  • Swiss cheese
  • Chuck meat
  • HAM
  • sliced Dill pickles
  • Swiss cheese
I placed the Cuban burgers in a Panini grill to crisp the bun a little bit.

The mayo and mustard laid a nice, creamy base for the burger. There was a little kick from the Dijon while the roasted garlic added sweetness. The burger was very juicy. The pink inside was smooth as butter, just the way I prefer. Since I glazed the ham , there was some sweetness from that too. The Dill pickles rounded it out well with a good crunch and bite from the vinegar.

It was a messy burger, but hey, they are all, and if it ain't messy, it ain't gonna be that good.

Served with a side of Sweet Potato Fries.

Tuesday, February 16, 2010

Ham Drunk- Cooking with Beer

Ham and beer is a great partnership. They are a great team that work together in perfect harmony. Sure, there are other ways to bake a ham, but why would you want to? Not only cooking a ham in beer makes it moist and tender, cooking a beer glaze into it further makes it all that much more tastier. Makes total sense, right?

Beer-baked Ham with Beer Glaze

Start by cutting cross sections into the ham and studding them with cloves. This step can be omitted if you don't prefer a clover taste.


Take your favorite 12 oz. beer and pour it over the ham. I chose a local beer, Leinenkugel's, the beer of North Woods.


Set the oven to 300 degrees and roast for about 3 hours. Baste the ham every 20-30 minutes with its own juices.


The kitchen started to smell of ham, beer, and clove just after ten minutes of cooking. I was starting to get hungry and impatient.

To prepare the glaze, mix together:
  • 1 cup of brown sugar
  • 1-2 tablespoons of flour
  • 2 tablespoons of cidar vinegar
  • 1 teaspoon of dry mustard
  • beer, to make paste

Stir to make a paste. If too watery, add more flour. If too thick, add more beer.


Apply the glaze to the ham after 2-2.5 hours. Spread it all over and fill it into the crevasses. This part was a lot of fun but it sucked to have to wait another 45 minutes. I wanted to dive right in and eat.


After 3 hours plus 30 minutes cooking the glaze, take the ham out and let it rest under a tent of foil for 15 minutes.

Damn, that looks good.


Cooking the ham with beer was a smart thing to do. Tasty, yes. Too much food, yes. But I don't care! It is so intoxicatingly good. The ham was moist while the outer layer was crispy and tangy.

I'd rather drink beer but it proves it is worth more than just a means to get numb. It is an essential ingredient to basting most meats. Add it to your kitchen staples list.

Sunday, February 14, 2010

Sunday Brunch

After working a very long day on Saturday and then playing a rough hockey game that night, I treated myself to a tasty mid-morning-afternoon Brunch.

I grabbed a few ingredients out from the fridge, prepped my cast iron, and set the oven ablaze. I love roasted asparagus, a close second to marking them up on the grill. Like most people on the planet, I love bacon too. And I also love the simplicity yet techinical aspect of a good, perfectly-cooked fried egg. With a few dashes and sprinkles of salt, pepper, and parsley, mixed with olive oil, I shoved the Bacon-Wrapped Asparagus into the mouth of the oven.

Ten minutes later, an adult beverage consumed, I had a beautiful combination of salty, crunchy, and creamy.


Woah Mama! This was a true tasty endeavor. The bacon fat cooked down into the stalky asparagus flavoring them to pornographic levels. And I really couldn't contain myself after splitting open the egg yolk and having it ooze all over the plate. It provided a warm goo that coated the stalks.

Maybe I ate too many asparagus. That thought will instantly slap me in the face later when I visit the bathroom for a good ole number one. But it was worth it.


It is a simple dish that gave me much excitement. Is there any more?

Wednesday, February 10, 2010

Proscuitto Asparagus Chicken with Fontina

I have been busy lately with house projects and shoveling mountains of snow. The laundry has piled up and so have the dishes from hosting a Super Bowl party. (I choose to make Chicago-style Italian Beef sandwiches.)

I decided to self-indulge for lunch today with a quick and easy satisfying meal. All you need is proscuitto, asparagus, chicken breast, and cheese.

First, preheat your oven to 450 degrees. Then you must butterly the chicken breast. Make your first cut in the thickest part of the breast and follow to the thinnest. Do not cut the breast into two pieces. It should open like a book.


Apply some salt and pepper. I omitted the salt since Proscuitto can be quite salty. Next, you want to place the breast between two sheets of plastic wrap and pound it thin. I forgot to do this step but it still works, maybe just a little harder to roll it all up.

You want to cook the asparagus on a hot skillet before you apply it to the chicken. Season with salt and pepper and cook for about 2-4 minutes. Layer the proscuitto, fontina cheese, and asparagus onto the chicken breast. I chose fontina because it melts well. I'm sure you can use whichever cheese you prefer.


Next, you want to roll it up and tie it together. I need work on my tying skills but this is important as tying the breast gives it shape, allows it to cook evenly, and keeps the stuffing inside.


Yeah, I know, shady job, but it did the trick. Now, you want to brown the chicken for a few minutes a side. I used my favorite cast-iron skillet to do the job. It gets nice and hot, even heated surface, and adds a wonderful crisp to the meat.


Place chicken in your preheated oven and cook for about 10-15 minutes, depending on the size of your chicken breast. I turned the breast a few times to get even crispness on all sides.


Served with a side of brocolini, this quick lunch gave me plenty of energy and "umpf" to get back to my housely duties. The cheese was melted to a nice gooey consistency while the proscuitto added the right amount of salt. The cast-iron gave the chicken an excellent crust.

Definitely give it a go. It's not to difficult and the flavors are huge. This also does real well on the open-flame of the grill.

Monday, February 1, 2010

Súp Nem Nuong đậu hũ - Vietnamese Pork & Tofu Soup

This is a different riff on the Vietnamese dish Nem Nuong. Instead of skewering the pork and grilling them over a flaming grill, I am going to braise them in a soup.

Nem means ground pork while Nuong means grilled. The pork patty generally is seasoned with salt, pepper, sugar, combined with Nuoc Mam (Vietnamese fish sauce), and finely minced garlic. It is commonly wrapped and rolled in rice paper to make a spring roll or cuon and dipped in Nuoc cham sauce. I made a homemade Nuoc cham sauce and I will share the recipe with you later.

I wanted to make a lot of pork balls so I combined:
  • 1 lb of ground pork
  • 1/2 teaspoon pepper
  • 2 garlic cloves, smashed and finely minced
  • 1 shallot, finely minced
  • small chile, finely chopped
  • 2 tablespoons of Nuoc cham sauce

After mixing the ingredients, I left it in the fridge for about an hour so the flavors could fuse together.

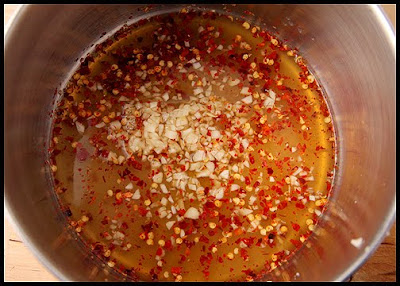
The Nuoc cham sauce is available in Asian markets but if it cannot be found, try this recipe.
  • 2 garlic cloves, finely minced
  • 1 teaspoon crushed red pepper flakes
  • 3 tablespoons of sugar
  • 2 tablespoons of lime juice
  • 4 tablespoons of fish sauce
  • 1 cup of water

Mix it all together to enhance the flavors and give it a good simmer for a few minutes.

Next, you want to form the pork balls. Shape them into any size you want. The smaller the better to achieve a decent bite size. I made them a little too big but I was getting excited.


I wanted to make a big pot of soup so I added about 6 cups of chicken stock. Now, homemade chicken or vegatable stock would make this soup way better but if you are pinched for time, a high-quality, store-bought stock will suffice. Bring the chicken stock to a simmer.

Baby bok choy and tofu was added to the dish for subtle flavors. While the soup simmers, chop up a head of baby bok choy.


Properly drain the firm tofu between a towel by putting a heavy weight on top of it. This will draw out the water. The longer length of time, the better. Chop up the firm tofu any style you like. I like mine the way the Japanese chefs cut tofu for miso soup, in little tiny blocks.


Add the pork balls to the simmering broth and cook for ten minutes. Then add the bok choy and cook an additional 5 minutes. Bring in the tofu at the end just to warm them up. Sprinkle on ripped-up sprigs of cilantro to garnish.


This version of Vietnamese Pork & Tofu soup was easy to prepare and satisifying to the taste. I added a little more of the Nuoc cham sauce into the bowl to give it a little more heat and sweetness. It rounded it out well. The pork balls were a little too big but the flavor was right on. The little cubes of tofu seemed to add a little creaminess while the bok choy and cilantro provided an earthy taste.